Introduction to file management with CLI
Introduction
Backing up files is an essential practice for any development process. The benefits initially might not seem straightforward, but backups provide a safety net for disaster recovery, ensuring that data can be restored in the event of hardware failures, accidental deletions, or natural disasters.
Backups often encompass local changes and experiments outside of the repository, ensuring that valuable work is not lost and can be integrated into the main codebase. Furthermore, repositories may not effectively handle non-code files and operational documentation, making backups crucial for their preservation. By providing redundancy and data integrity, backups reduce the risk of relying solely on a single repository. They also facilitate long-term archiving, ensuring access to historical data even if repository policies change or there is a switch to a different provider.
Traditional cloud storage services, while convenient, are centralized and often have clauses in their terms and conditions that allow them to share your data with third parties and government agencies. This is where BNB Greenfield, a new decentralized storage on BNB Chain, comes in as a more secure and private alternative for backing up your files.
In this tutorial, we will guide you through the process of setting up your environment, installing the necessary tools, and effectively backing up your files to BNB Greenfield, leveraging the benefits of decentralized storage while ensuring data security and ownership.
We will also cover how to interact with the CLI tool, choose storage providers, manage your account balance, and manage buckets and uploaded files.
Setting Up the Environment
Installation
Greenfield Command is a powerful command line to interact with Greenfield. To begin, you will need to install the BNB Greenfield command line tool follow the instruction from CLI github page.
When running commands that interact with the greenfield, if there is no config/config.toml file under the path and the commands runs without "--config" flag, the tool will generate the config/config.toml file automatically which is consistent with the network configuration under the path.
Config file example will set up the necessary RPC address and chain id:
- Mainnet
- Testnet
rpcAddr = "https://greenfield-chain.bnbchain.org:443"
chainId = "greenfield_1017-1"
rpcAddr = "https://gnfd-testnet-fullnode-tendermint-us.bnbchain.org:443"
chainId = "greenfield_5600-1"
Impport Account and Generating Keystore
To set up your identity on the local machine and generate a keystore file, you will need to create the private file which will hold the identity private key. You can export your private key from MetaMask and write it into a local file as plaintext (You can select "Account Details" from the dropdown menu of MetaMask. Click on the "Export Private Key" button at the bottom of the page. Once you have the files ready, run the following command "account import [keyfile]" :
// import key and generate a keystore file
// key.txt indicates the private key file
gnfd-cmd account import key.txt
The terminal will prompt user to enter the password information. Users can also specify the password file path by using the "--passwordfile". While the password doesn’t have any restriction on the length or complexity, it’s better to follow generally recommended principles.
This command will create a keystore file and store it in the path "keystore/key.json" under the home directory of the system or the directory set by "-home" and will be picked up by the CLI for commands that require identity and payment. After generating the keystore file, make sure to delete the key.txt file with the private key inside.
Interacting with BNB Greenfield
BNB Greenfield is built on a distributed architecture where storage providers play a crucial role. The network consists of multiple storage providers that offer their resources to store and retrieve data from users. When using BNB Greenfield, users have the flexibility to choose which storage providers to utilize based on several factors, including price, terms and conditions, and network performance.
When selecting storage providers, users can query the decentralized storage network through the CLI tool to obtain information about available providers. The list of providers will include their operator addresses and corresponding endpoints. Users can then analyze the providers based on the aforementioned factors and choose the ones that best align with their requirements.
For the advanced use cases, users can diversify their storage across multiple providers to enhance redundancy and mitigate the risk of data loss. This approach distributes data among different providers, ensuring that even if one provider experiences issues, the data remains accessible from other providers. By carefully selecting storage providers based on price, terms and conditions, and network performance, users can optimize their decentralized storage experience and maintain control over their data while enjoying the benefits of enhanced security and privacy.
Selecting Storage Providers
To query the network and get a list of storage providers, execute:
./gnfd-cmd sp ls
The result should display a list of storage providers. For mainnet, there are several active storage providers, which can be used for development purposes.
name     operator address                           endpoint                               status
bnbchain 0x231099e40E1f98879C4126ef35D82FF006F24fF2 https://greenfield-sp.bnbchain.org:443 IN_SERVICE
defibit  0x05b1d420DcAd3aB51EDDE809D90E6e47B8dC9880 https://greenfield-sp.defibit.io:443   IN_SERVICE
ninicoin 0x2901FDdEF924f077Ec6811A4a6a1CB0F13858e8f https://greenfield-sp.ninicoin.io:443  IN_SERVICE
nariox   0x88051F12AEaEC7d50058Fc20b275b388e15e2580 https://greenfield-sp.nariox.org:443   IN_SERVICE
lumibot  0x3131865C8B61Bcb045ed756FBe50862fc23aB873 https://greenfield-sp.lumibot.org:443  IN_SERVICE
voltbot  0x6651ED78A4058d8A93CA4979b7AD516D1C9010ac https://greenfield-sp.voltbot.io:443   IN_SERVICE
nodereal 0x03c0799AD70d19e723359E036a83E8f44f4B8Ba7 https://greenfield-sp.nodereal.io:443  IN_SERVICE
The price for each storage provider can be checked using the operator address, for example:
./gnfd-cmd sp get-price 0x231099e40E1f98879C4126ef35D82FF006F24fF2
The response will retrieve the price for reading the data, as well as for storing the data per second.
get bucket read quota price: 0.1469890427  wei/byte
get bucket storage price: 0.02183945725  wei/byte
get bucket free quota: 1073741824
To deduce the price for gigabytes (GB) per month from the metric of data usage in wei/byte, one needs to multiply the result by 0.002783138807808, as there are 1,073,741,824 bytes in 1 GB, 2,592,000 seconds in a month (30 days 24 hours 60 minutes * 60 seconds), and 10^18 wei in 1 BNB.
The result will be the price for storing or transferring data in gigabytes per month, expressed in BNB. This calculation takes into account the rate of data usage and the duration of a month. Following the returned rate of wei/byte/sec, the converted amounts are:
get bucket read quota price: 0.00041 BNB/GB/month
get bucket storage price: 0.00006 BNB/GB/month
Keep in mind that the pricing model and calculations may vary depending on the specific storage provider you are using. Always refer to the documentation or provider's information for accurate and up-to-date pricing details.
Account Management
While BNB Smart Chain (BSC) and BNB Greenfield define their accounts in the same format, it's important to understand that they are two separate blockchains with distinct ledgers. As a result, users need to manage their balances separately on both BSC and BNB Greenfield blockchains.
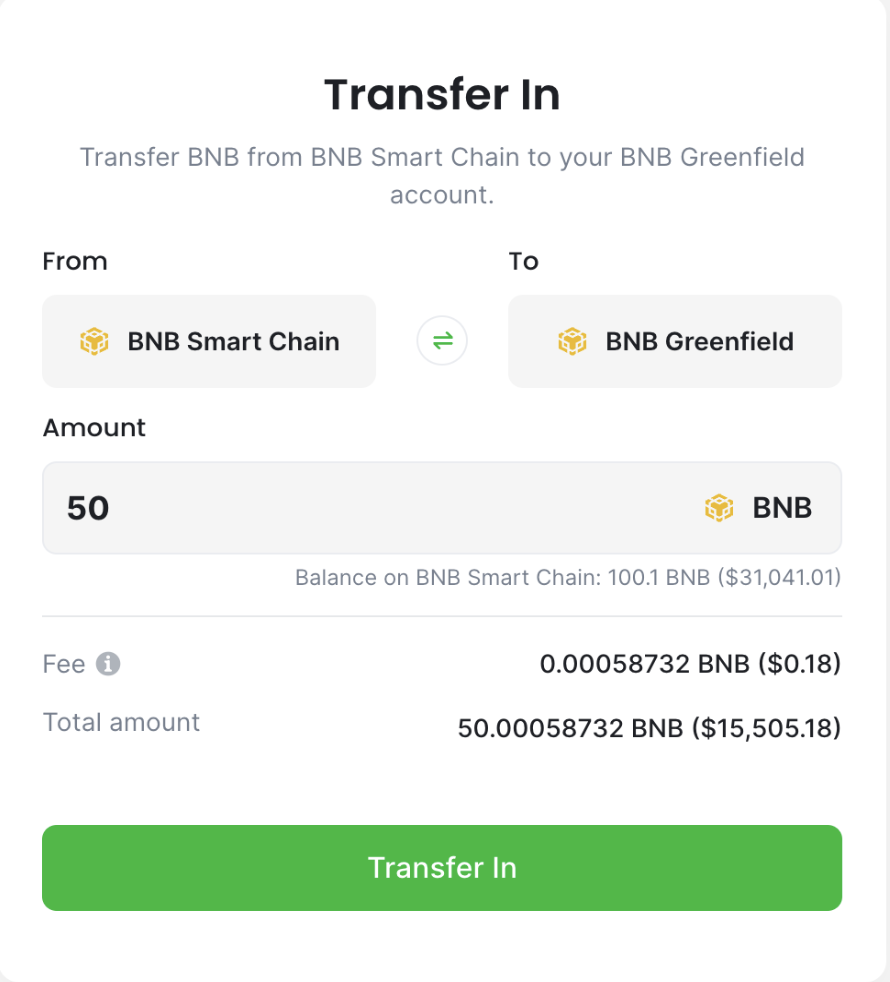
To transfer test BNB from the BSC to BNB Greenfield, users can utilize the dCellar application. By using the dCellar application, users can initiate the transfer process from their BSC address to their BNB Greenfield address.
For testnet, users can acquire test BNB tokens for testing purposes by using a test faucet provided by BNB Greenfield which can be accessed at https://gnfd-bsc-faucet.bnbchain.org/. By visiting the faucet website, users can request a certain amount of test BNB tokens to be sent to their BSC testnet address.
The balance can be checked using the following command:
./gnfd-cmd bank balance --address 0x14cfe3777565d942f7a3e1d1dcffd7945170c8fe
And the result will be the current balance:
balance: 10001464255952380934 weiBNB
Object Operations
In BNB Greenfield objects and buckets are key components. Buckets are containers used to organize and manage data, while objects are the actual files stored within those buckets. Buckets serve as top-level storage units with unique names, and objects have unique identifiers within their respective buckets. Users can perform operations on objects, such as uploading, downloading, and deleting, while applying permissions and access controls at the bucket and object level. This structure allows for efficient storage, organization, and retrieval of data in a decentralized storage network.
To create a bucket one need to call the following storage make-bucket command with the desired bucket name.
./gnfd-cmd bucket create gnfd://bucket123123123
The operation will automatically choose a storage provider and submit a transaction to BNB Greenfield blockchain to write the associated metadata. Alternatively you can provide storage provider address, that is operator-address, if a specific provider should be used. The result should look something similar to the following:
choose primary sp: https://greenfield-sp.bnbchain.org:443
create bucket bucket123123123 succ, txn hash: 0x6c89316c5912cda8b69eac6e96aa644d374c39c635e07fae4297e03496e7726a
As you can see, the result returns a transaction hash, which one can inspect using the block scanner, e.g. https://greenfieldscan.com. Going to https://greenfieldscan.com/tx/0x6c89316c5912cda8b69eac6e96aa644d374c39c635e07fae4297e03496e7726a, will show all the details of the transaction.
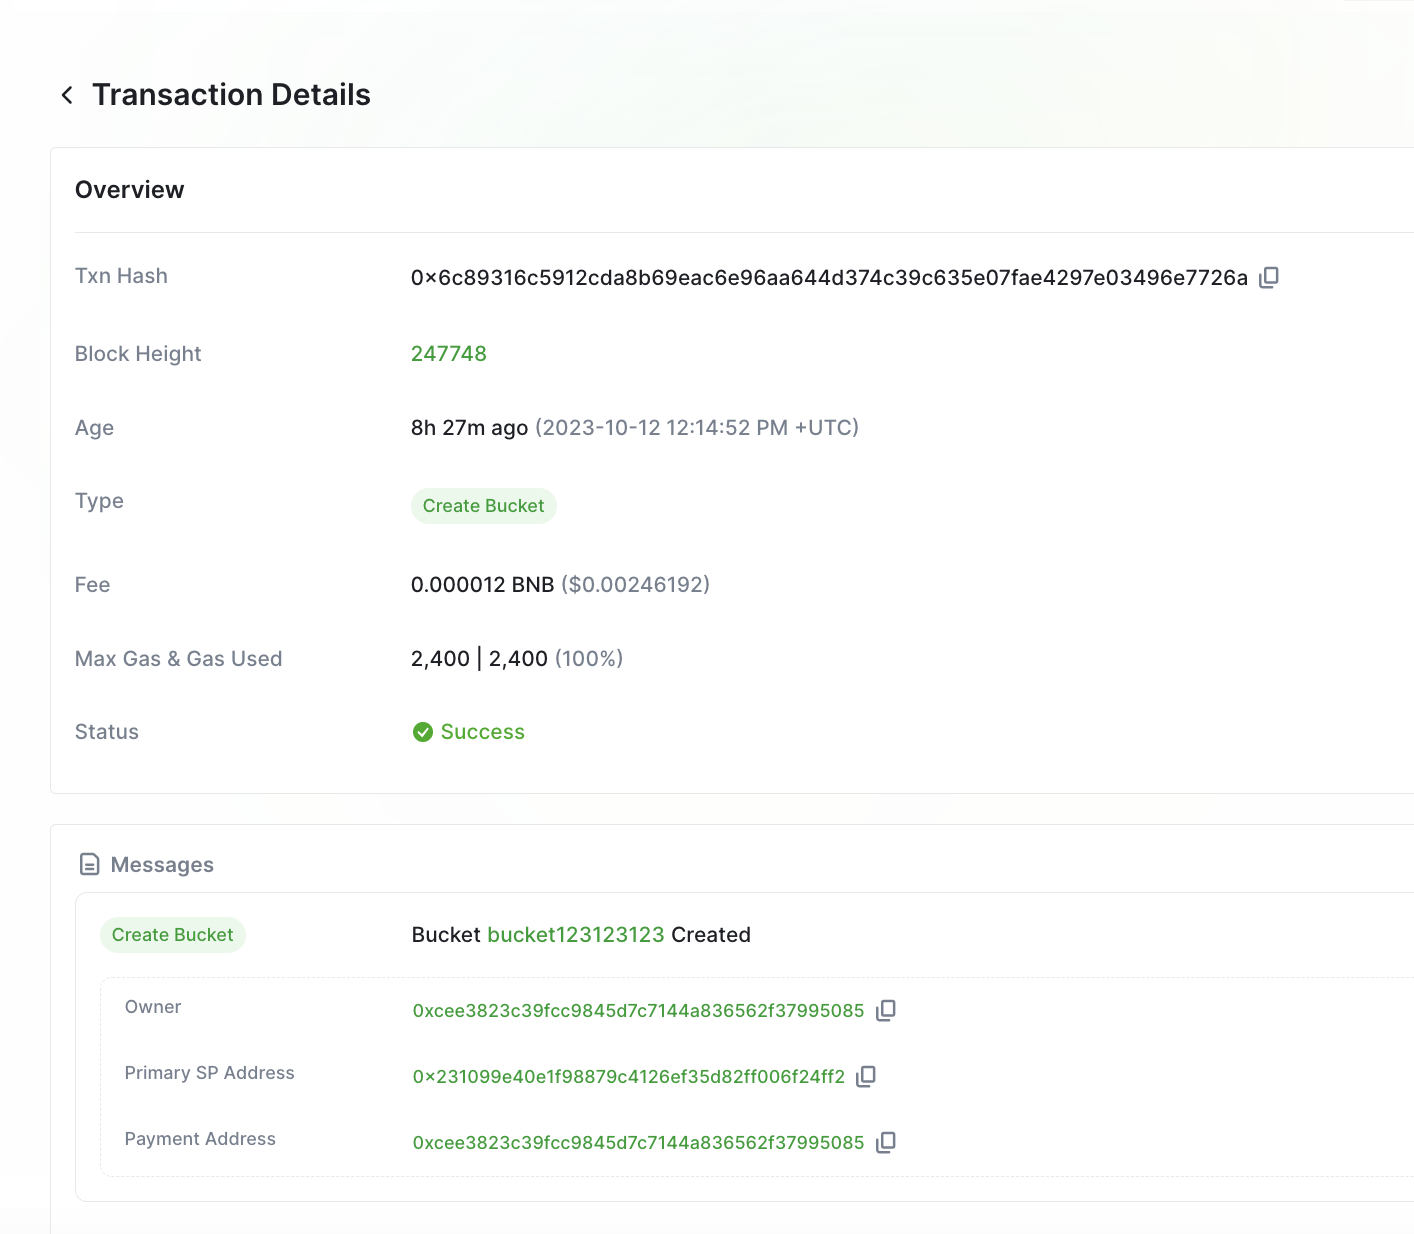
Notice that we in the details we can see the bucket owner details, moi; primary storage provider address, and the payment address. Since we haven’t created a separate payment account, our default account will serve as the payment account as well.
With regards to the storage provider address, if you remember, it was picked for us automatically as https://greenfield-sp.bnbchain.org:443. And from Selecting Storage Providers section we can see that its address is indeed 0x231099e40E1f98879C4126ef35D82FF006F24fF2.
Lastly, it’s time to upload a file, but before we upload anything, let’s create one with a sample text using the echo command as follows:
echo 'Random sample text' > test4.txt
Finally to upload the file to our newly created bucket bucket123123123, one needs to execute the following command:
./gnfd-cmd object put --contentType "text/xml" --visibility private ./test4.txt gnfd://bucket123123123/test4.txt
Notice that we’ve provided the visibility flag and made the file private. The successful result should be similar to the following:
create object test4.txt on chain finish, txn Hash: 0x5a885b7da8e8eb6921c84540d29b385b2dcee1f5ebdb4bb6c9219cf82e6ca80d
put object test4.txt successfully
Similarly, going to https://greenfieldscan.com/tx/0x5a885b7da8e8eb6921c84540d29b385b2dcee1f5ebdb4bb6c9219cf82e6ca80d will show the details of the file upload. Here, observe the transaction payload and scroll to the “visibility” attribute, which confirms the privacy status.
{"key":"visibility" "value":"\"VISIBILITY_TYPE_PRIVATE\"" }
After successfully uploading the file, let’s verify the content of the file and compare it to the one we’ve uploaded - they should be identical.
./gnfd-cmd object get gnfd://bucket123123123/test4.txt ./test4-copy.txt
The operation will download the file and output the length of the file, as follows:
download object test4.txt successfully, the file path is ./test4-copy.txt, content length:19
If you know the sp endpoint that object belongs to, you can optimize the download speed by add --spEndpoint flag to download cmd, such as:
./gnfd-cmd object get --spEndpoint https://gnfd-testnet-sp3.nodereal.io gnfd://bucket123123123/test4.txt ./test4-copy.txt
To validate the integrity of the file, we can compare its content to the originally uploaded one. Empty output confirms there are no differences.
diff test4.txt test4-copy.txt
Upload multiple objects
gnfd-cmd also support uploads all files from a folder recursively.
Let's say that there is a folder called website where you store all the files for your website.
$ ls
index.html  plato.jpeg  styles.css
To upload all these files into your bucket, you can run the following commands:
gnfd-cmd object put --recursive ./website gnfd://ylatitsb
Please note that --recursive is used to put all files or objects under the specified directory or prefix in a recursive way. The default value is false
The successful result should be similar to the following:
================================================
Your batch upload is submitted as a task, task ID is sdgerdf-sfdgasg-1237hedfg
You can check your task status and progress by using cmd as below:

- List all your tasks: ./gnfd-cmd task ls
- Check status: ./gnfd-cmd task status --task.id taskID
- Retry (in case this process is killed accidentally): ./gnfd-cmd task retry --task.id taskID
- Delete task: ...

>>================================================
Upload Task building

sealed index.html
Task Operations
When object put --recursive is used, tasks are automatically created
You can view/retry/delete tasks with gnfd-cmd task
Using the gnfd-cmd task requires a new session to be opened while the gfnd-cmd object put --recursive is in progress. If the current session is interrupted, the put object is interrupted
./build/gnfd-cmd task status --taskId abe92a9a-1aa0-45be-9e0b-4cd400c38a06
Viewing Task status
taskId will be generated after the gfnd-cmd object put --recursive
Folder: ./website
Status: created
sealed            index.html
wait_for_upload   styles.css
./build/gnfd-cmd task retry --taskId abe92a9a-1aa0-45be-9e0b-4cd400c38a06
gfnd-cmd object put --recursive will be used to retry after a failure or interruption
task: abe92a9a-1aa0-45be-9e0b-4cd400c38a06
folder name: ./website
retrying...

sealed index.html
./build/gnfd-cmd task delete --taskId abe92a9a-1aa0-45be-9e0b-4cd400c38a06
You can delete a task by deleting it
You can go to GreenfieldScan to view the change of your bucket.
Conclusion
Overall, backups during software development offer peace of mind, efficient recovery, and safeguarding of the project's integrity. They minimize downtime and prevent significant setbacks.
After gaining familiarity with the command line tool and BNB Greenfield through this tutorial, the next step is to explore and experiment with creating files, buckets, and permission groups. By creating multiple files and organizing them into buckets, users can gain hands-on experience with the storage capabilities of BNB Greenfield.
It is highly recommended for users to engage in hands-on exploration by trying out different wallets and understanding the basic operations and permissioning mechanisms. This will provide a deeper understanding of how BNB Greenfield functions and how to effectively manage and secure data within the decentralized storage system.
This practical experience will pave the way for comprehending more advanced topics discussed in future articles, such as programmability and BNB Greenfield's innovative concept of flow-based billing and asset monetization. By exploring the diverse functionalities and experimenting with different configurations, users can unlock the full potential of BNB Greenfield and unlock its new data economy concepts.