Storing NFTs on IPFS & Filecoin
After the preview two tutorials, you must have learned how to write NFT smart contract and deploy it on BSC testNet. The most important part for any NFT project is that where your NFT assets are stored. If you want to avoid the risk of losing your NFT assets or not able to access them, storing your NFTs on decentralized network is the better option for you.
So in this tutorial, we will walk you through the process of storing your NFT assets on decentralied storage network, like IPFS & Filecoin. We will use NFT.Storage in this tutorial since it provides easy to use API/SDK for developers to upload their NFT assets on both IPFS and Filecoin.
What we will use in this tutorial:
- Node.js
- NFT.Storage
- BSC Testnet
- Remix IDE
- Metamask
Store NFTs using NFT.storage
NFT.Storage is a storage service that lets you store off-chain NFT assets decentralized for free. Your NFT assets will be stored on both IPFS and Filecoin for the guaranty of fast content-addressing and retrieval on IPFS, as well as verifiable long-term storage on Filecoin.
NFT.Storage provides multiple ways to upload your NFTs, from user-friendly web UI and NFTUp application to easy to use API to support developers. So it is especially useful for individual creators who are minting NFTs, or NFT tooling developers looking to support creators and collectors!
In this tutorial, we will more focus on developers who is integrating NFT.Storage into their application to Mint NFTs. If you want to learn more about different ways to upload and manager your NFTs, you can check this Quick Start docs.
Then let's get started.
Create an account and get an API token
If this is the first time you use NFT.Storage, you need to create a NFT.Storage account to get a API token which you can use in your applications when you upload NFTs.
You can sign up an account for free using either your email or GitHub.
Go to nft.storage/login to get started.
Click GitHub on the Login screen.
Authorize NFT.Storage when asked by GitHub.
Once you are logged in success, you can click the API Keys to create an token.

Click + New Key, and enter a descriptive name for your API token and click Create.
Now you have successfully create a API Token, you can click Action- Copy to copy it to your clipboard to use it later.
Upload NFTs using Javascript Client
The NFT.Storage JavaScript client makes it simple to upload files and create ERC-1155 compatible NFT metadata in your NFT applications. Both NFT and its metadata will be stored on IPFS and Filecoin, you will receive a IPFS URL for you metadata which you can use to mint your NFT.
We will use a simple node JS script to demonstrate the code to upload NFT and receive the corresponding IPFS URL for its metadata. You can easily integrate this function in your JavaScript or TypeScript applications.
You'll need Node.js version 16 or later for this example.
Make a new JavaScript project.
mkdir nft-storage-quickstart
cd nft-storage-quickstart
npm init
NPM will ask a few questions about your project and create a
package.jsonfile.Install
nft.storageclient in your project.Run the following command to install the latest version of
nft.storagepackage, and also installmimepackage for the file types.npm install nft.storage
npm install mimeCreate a file called
upload.mjsand open it with your VS Code.Below is the code you need to upload an image with ERC-1155 compatible NFT metadata.This code here will be used only as example, you can add similar upload logic in your application.
import { NFTStorage, File } from "nft.storage"
import fs from 'fs'
import dotenv from 'dotenv'
dotenv.config()
//This the the API token you have created earlier which is added as one env variable.
const API_KEY = process.env.NFT_STORAGE_API_KEY

async function storeAsset() {
   const client = new NFTStorage({ token: API_KEY })
   const metadata = await client.store({
       name: 'ExampleNFT',
       description: 'My ExampleNFT is an NFT example!',
       image: new File(
           [await fs.promises.readFile('MyExampleNFT.png')],
           'MyExampleNFT.png',
           { type: 'image/png' }
       ),
   })
   console.log("Metadata stored on Filecoin and IPFS with URL:", metadata.url)
}

storeAsset()
   .then(() => process.exit(0))
   .catch((error) => {
       console.error(error);
       process.exit(1);
   });
The main part of the script is the
storeAssetfunction. It creates a new client connecting to NFT.Storage using the API key you created earlier. Next we introduce the metadata consisting of the name, description, and image. Note that we are reading the NFT asset directly from the file system from theassetsdirectory. At the end of the function, we will print the metadata URL as we will use it later when creating the NFT on BNB Chain.Run your script with nodeJS
Let's execute the upload logic by running the script and see the output.
node upload.mjsThe output should look like down blow. You can directly use the IPFS URL to mint NFT token, or use the URL of NFT.Strorage gateway. For instance,
https://nftstorage.link/ipfs/<CID of your NFT>/metadata.jsonMetadata stored on Filecoin and IPFS with URL: ipfs://bafyreihegljuej4y4ai5ftzb2rdztseb5mmjzba5f5xcdktgd43rkoxhw4/metadata.json
Now you have your NFT assets stored on IPFS and Filecoin, you can access it via NFT.Strorage gateway and you are ready to mint your NFT. Please record the metadata url which we will use to mint NFT later.
Mint NFTs
This tutorial will more focus on how to store NFT assets on IPFS and Filecoin other them teaching how to develop NFT smart contract. If you wish to learn how to deploy NFTs on BSC, you should learn it from Deploy NFTS on BSC using Truffle.
In this section, I will simply use Remix to write NFT contract, deploy and invoke it via MetaMask. Before we move forward, let's make sure you have the following items ready.
- Installed MetaMask.
- Configured BNB Smart Chain TestNet on MetaMask.
- Requested BNB TestNet tokens.
Write NFT contract using Remix
We will use Remix IDE to write your NFT contract. In this example, we are going to use ERC721URIStorage from OpenZeppenlin.
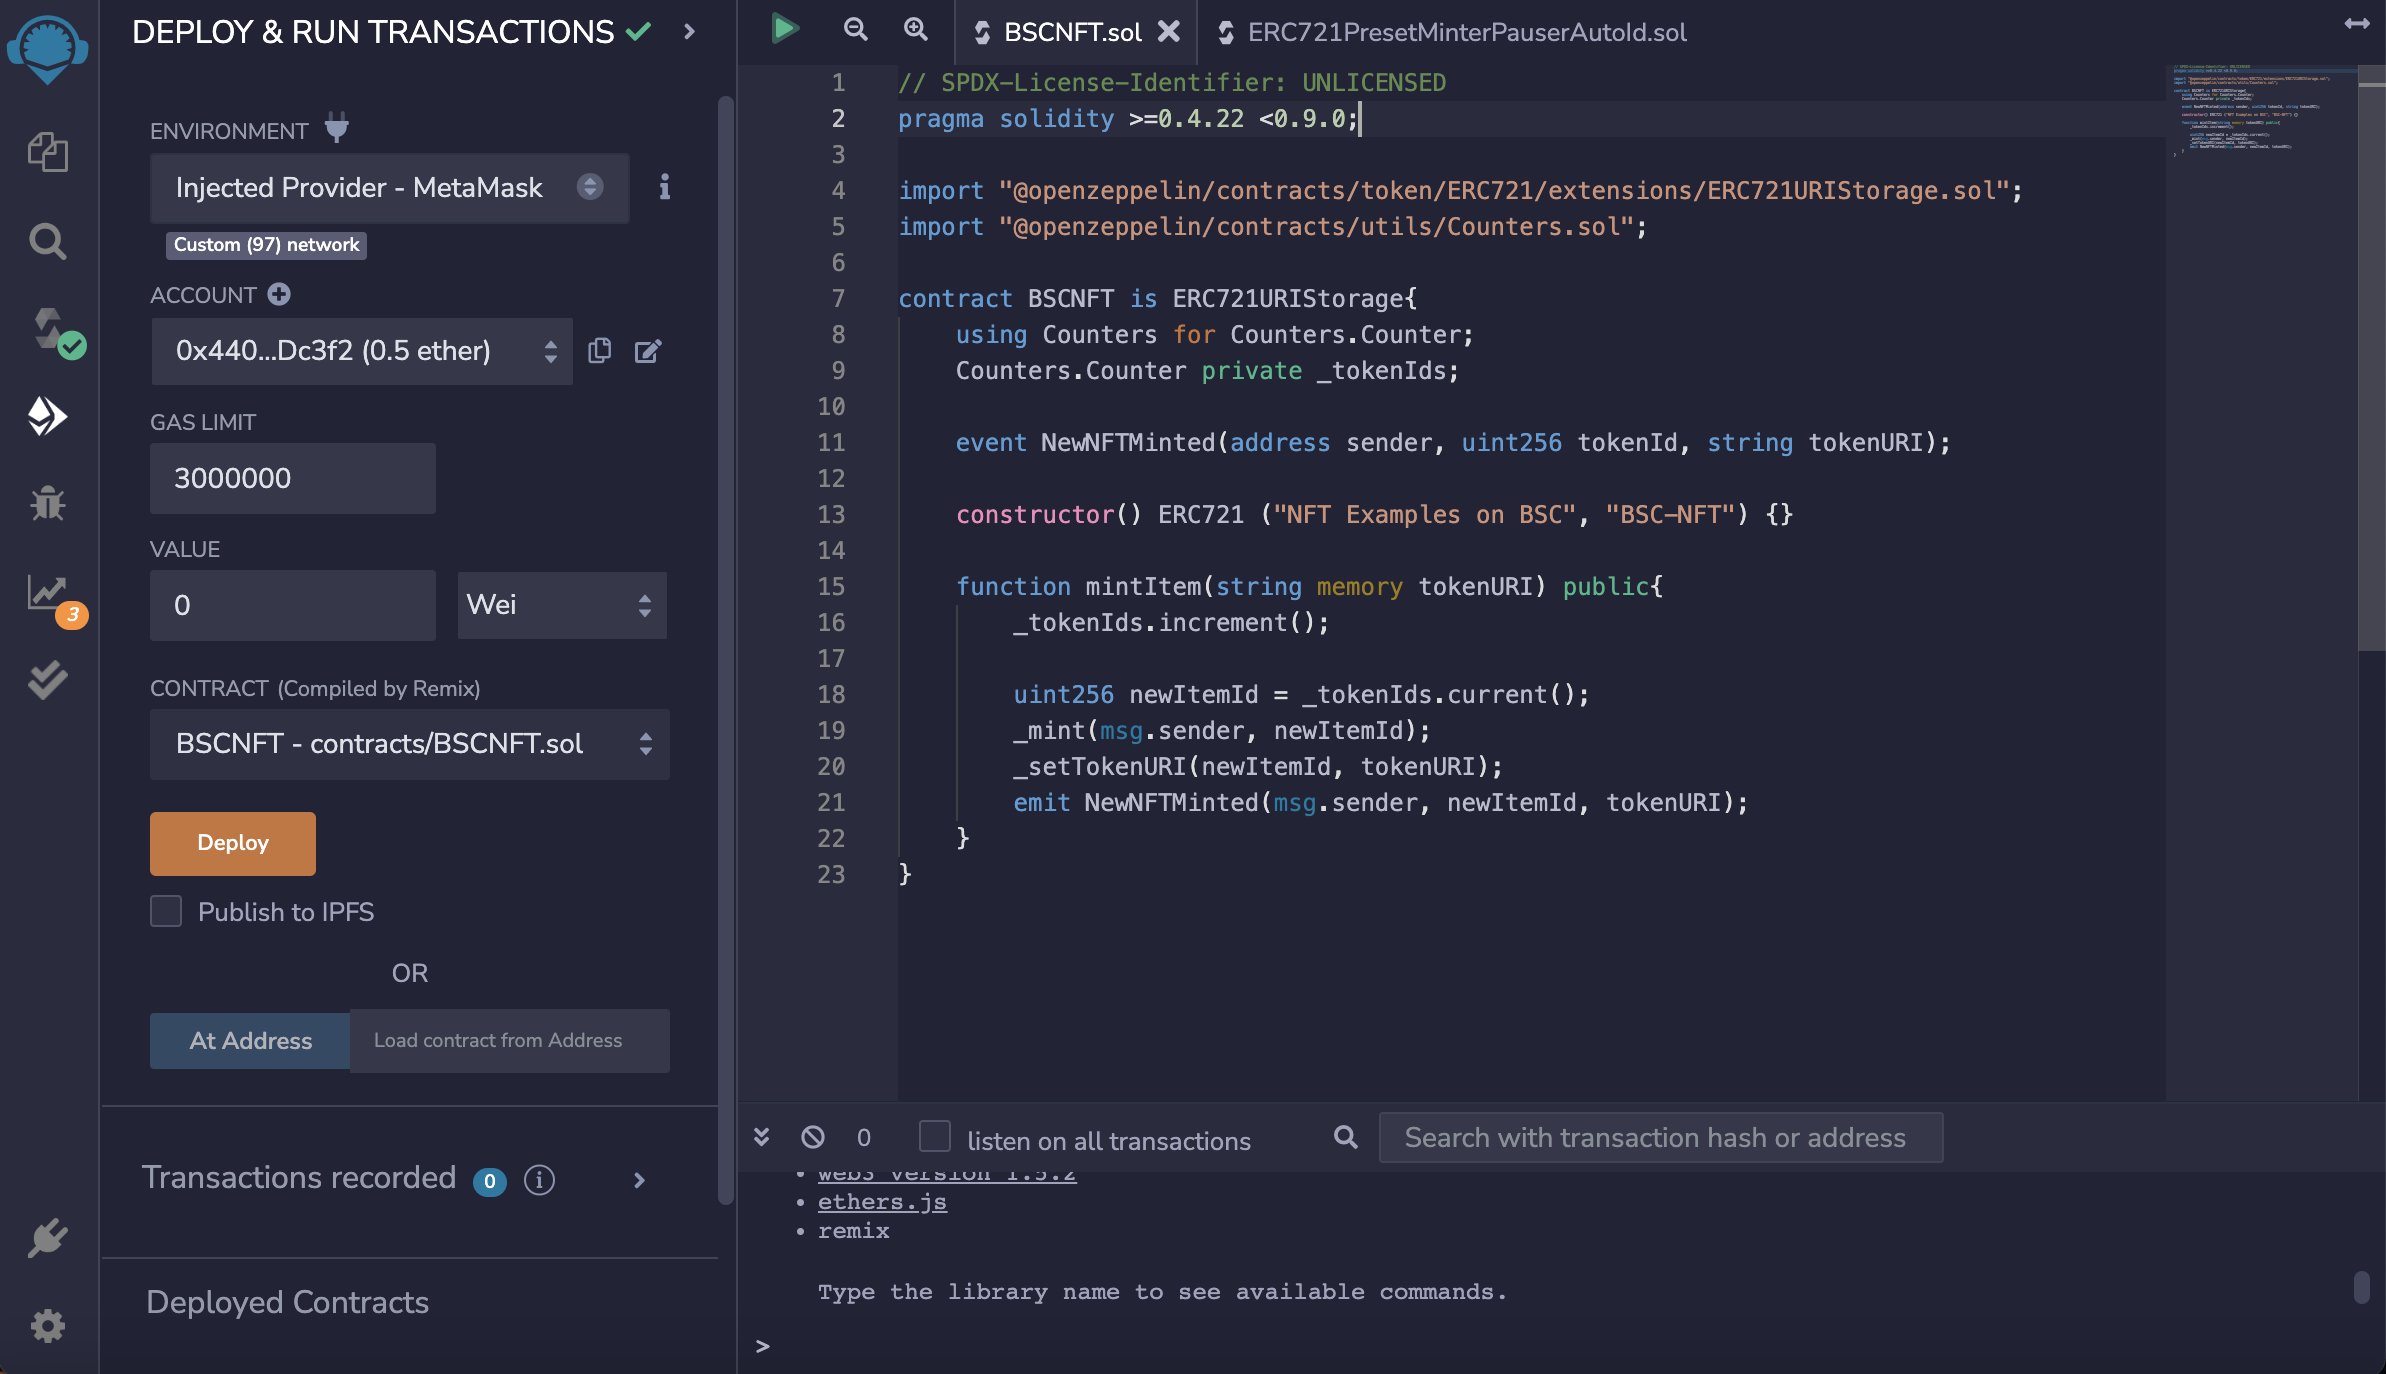
Open Remix IDE, create a new solidify file, name it NFTExample.sol and copy the contract code down blow.
// SPDX-License-Identifier: UNLICENSED
pragma solidity >=0.4.22 <0.9.0;
import "@openzeppelin/contracts/token/ERC721/extensions/ERC721URIStorage.sol";
import "@openzeppelin/contracts/utils/Counters.sol";

contract BSCNFT is ERC721URIStorage{
    using Counters for Counters.Counter;
    Counters.Counter private _tokenIds;
    event NewNFTMinted(address sender, uint256 tokenId, string tokenURI);

    constructor() ERC721 ("NFT Examples on BSC", "BSC-NFT") {}

    function mintItem(string memory tokenURI) public{
        _tokenIds.increment();
        uint256 newItemId = _tokenIds.current();
        _mint(msg.sender, newItemId);
        _setTokenURI(newItemId, tokenURI);
        emit NewNFTMinted(msg.sender, newItemId, tokenURI);
    }
}
If everything works fine, the Remix will compile your smart contract automatically and it is ready to be deployed to BSC TestNet.
Deploy your NFT contract
Before deploying your NFT smart contract, make sure you switch the network to BSC TestNet on MetaMask and also have some test tokens to pay for transaction fees.
On the Remix IDE, go to Deployment page and make sure you choose Injected Provider - MetaMask for the environment. Now, you can click the Deply button and confirm the transaction on MetaMask.
Once the deployment transaction is confirmed on-chain, you will be able to verify the transaction and contract on BSC TestNet blockchain explorer.
You can also directly interact with the deployed NFT contract on Remix IDE. Try to invoke the name and symbol methods to verify if this is the NFT contract you deployed.
Mint your NFT
Now, we are all set to mint the NFT. Instead of using metadata storing on centralized server, we will use the metadata which we stored on IPFS & Filecoin using NFT.Storage in previous steps.
We will copy the NFT metedata URL, something like ipfs://bafyreihegljuej4y4ai5ftzb2rdztseb5mmjzba5f5xcdktgd43rkoxhw4/metadata.json and mint NFT on Remix IDE.
On Remix IDE, go to the
Deployed Contractssection and findmintItemmethod.Paste the NFT metadata URL in the tokenURI params field, and click
transact.
You will need to confirm and sign the transaction when MetaMask popup for confirmation.
Verify your newly minted NFT Once the transaction is confirmed on BSC TestNet, you will be able to verify whether your NFT is minted successfully or not by invoking either
balanceOforownerOf. I will takebalanceOfas the example here. You can also verify your NFT on Opensea Testnets once you connect to MetaMask account. Then you will be see the freshly minted NFT under your account.